

General Contracting

CALL NOW!
315-748-0623
585-794-7883
Schedule a free, no pressure roof inspection today.

CALL NOW!
315-748-0623
585-794-7883
Schedule a free, no pressure quote today.
Syracuse's most versatile contractor
We do more than just roofs.
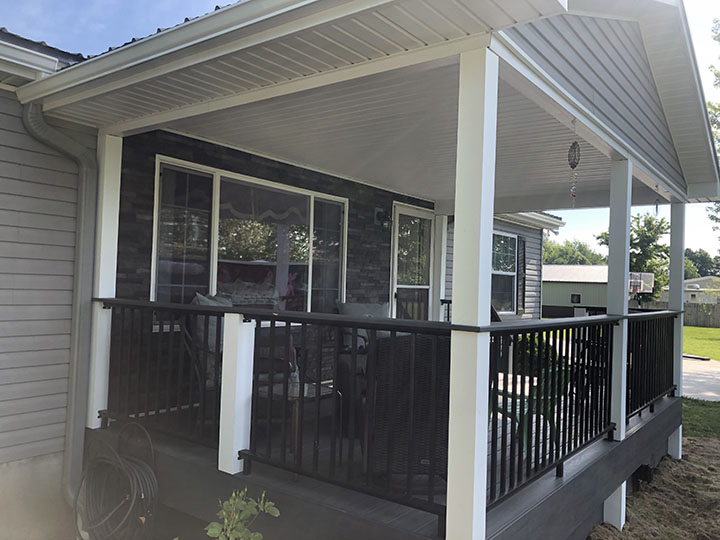
We specialize in vinyl siding, porches, decks, seamless gutters, skylights, insulation, and full remodels.
Contact us today for a free, no obligation quote and our friendly assessment team will be at your door.
What Is a Roofing Insurance Claim?
A roofing insurance claim helps homeowners cover the cost of storm damage repair or roof replacement
Typically applies to damage from hail, wind, falling debris, or severe weather
Most claims are filed under your homeowner’s insurance policy
Common Types of Covered Roof Damage
Hail damage (bruised or cracked shingles)
Wind damage (missing or lifted shingles)
Storm damage from heavy rain or debris
Ice dam damage in colder climates
Tree impact or sudden structural damage
Signs You Should File a Roof Insurance Claim
Visible shingle damage after a storm
Roof leaks or water stains on ceilings
Dented gutters, vents, or flashing
Granule loss across large roof areas
Recent severe weather event in your area
Roof Insurance Claim Process: Step-by-Step
1. Roof Inspection
Schedule a professional roof inspection after a storm
Contractor documents all damage with photos and notes
2. File the Claim
Contact your insurance company promptly
Provide inspection details and date of damage
3. Adjuster Inspection
Insurance adjuster inspects the roof
Your roofing contractor should be present to advocate for proper coverage
4. Claim Approval
Insurance provides a scope of work and estimate
Review for accuracy to ensure all damage is included
5. Roof Repair or Replacement
Work begins once claim is approved
Contractor completes repairs to insurance standards
6. Final Payment
Insurance releases remaining funds after project completion
What to Expect During the Process
Clear documentation of all roof damage
Communication between contractor and insurance company
Possible supplemental claims if hidden damage is found
Timeline may vary depending on claim approval speed
Cleanliness & Professional Job Site Standards
Property protection during inspections and repairs
Careful handling of materials and debris
Full cleanup after repairs or roof replacement
Magnetic nail sweep and debris removal
Communication You Should Receive
Step-by-step guidance through the claims process
Help understanding your insurance paperwork
Updates on claim status and project timeline
Honest advice on repair vs. replacement
Key Insurance Claim Tips
Act quickly after storm damage—claims have time limits
Never sign contingency agreements without understanding terms
Choose a licensed and insured roofing contractor
Avoid out-of-town “storm chaser” companies
Keep records of all communication and documentation
Why Work With a Roofing Contractor for Insurance Claims
Accurate damage assessment and documentation
Experience working with insurance adjusters
Helps maximize your claim coverage
Ensures repairs meet building codes and manufacturer standards
When a Claim May Be Denied
Damage caused by normal wear and tear
Lack of maintenance or old roof age
Improper installation from previous work
Filing too long after the damage occurred
Our Commitment to Homeowners
Hassle-free insurance claim assistance
Fast response after storm damage
High-quality roof repair and replacement
Transparent communication from start to finish
What to Expect During Your Siding Replacement Project
Replacing your home’s siding is one of the most impactful exterior upgrades you can make—it protects your home’s structure, improves energy efficiency, and transforms curb appeal. Here’s a professional walkthrough of the process from tear-off to final inspection.
Before Installation Begins
Site Preparation
Your contractor will schedule a material delivery before the crew arrives—clear your driveway to make room for siding bundles, trim coils, and accessories.
To prepare your property:
- Trim trees and shrubs back at least 6 inches from your home’s perimeter so crews have full access to the walls
- Tarp your gardens and landscaping around the foundation to protect plants from falling debris
- Cut your grass short—at the end of each day, the crew will run a heavy magnet through your yard to collect stray nails and fasteners
- Move outdoor furniture, grills, and décor away from the work zone
- Make an exterior electrical outlet accessible—power tools need a reliable source
Inside, remove pictures, shelves, and breakable items from walls—the vibration from tear-off and nailing can knock things loose.
Special Arrangements
Pets and small children should stay away from the work area during installation. If you work from home, expect significant noise intrusion—many homeowners relocate to a coffee shop or library during the project.
Phase 1: Tear-Off and Inspection
The crew begins with complete tear-off—stripping the existing siding down to the sheathing (the flat plywood or OSB layer covering your wall framing.
This step is louder and messier than the rest of the project, but it’s essential. Tear-off allows your contractor to:
- Inspect the underlying structure for rot, mold, or moisture damage
- Identify hidden repairs that weren’t visible before
- Assess the condition of your housewrap (the weather-resistant barrier beneath the siding)
Any damaged or rotten wood must be removed and replaced before new siding goes up—skipping this step leads to future problems.
Tear-off vs. Reside: Installing new siding over existing material (a “reside”) costs less upfront, but it hides problems and isn’t always the right move. A full tear-off is the industry-preferred approach for long-term performance.
Phase 2: Surface Preparation
Once the old siding is removed and repairs are complete, the crew prepares the wall surface:
- Install or repair housewrap to create a continuous moisture barrier
- Add flashing around windows, doors, and penetrations to direct water away from vulnerable joints
- Install furring strips or insulation board if you’re upgrading to insulated siding for improved energy performance
This prep work determines how well your new siding sheds water and holds up over time.
Phase 3: Siding Installation
New panels go up starting from the bottom of each wall and working upward. The crew will:
- Install starter strips along the foundation line to lock the first course in place
- Hang siding panels with proper overlap and fastening patterns
- Cut and fit around architectural features—windows, doors, gables, dormers, and corners require precision trim and detail work
- Install J-channel, corner posts, and soffit to finish edges cleanly
- Add ventilation components if your soffit system requires airflow for attic ventilation
Homes with many windows, complex rooflines, dormers, or decorative gables require more cutting and fitting—this is where craftsmanship shows.
Phase 4: Daily Cleanup and Final Inspection
A professional crew cleans up debris at the end of each workday. The final steps include:
- Magnet sweeps of your lawn and landscaping to collect nails and metal scraps
- Removal of all old siding and packaging materials
- Final walk-through inspection to verify the installation meets manufacturer specifications and industry standards
Ask your contractor about warranties and guarantees—both the material warranty from the manufacturer and a workmanship warranty covering the installation itself.
Timeline and Cost Expectations
| Factor | Impact on Cost |
|---|---|
| Material choice (vinyl vs. steel vs. fiber cement) | Vinyl costs less; premium and insulated options run higher |
| Tear-off vs. reside | Full tear-off adds labor but reveals hidden issues |
| Home size and stories | Larger homes and multi-story work increase crew time |
| Trim and detail work | Complex architecture with many windows, dormers, and gables adds fitting time |
| Hidden repairs | Rot, mold, or sheathing damage discovered during tear-off |
Most projects range from $15,000 to $45,000+, or roughly $8 to $23 per square foot installed, depending on these variables. A small single-story ranch lands on the lower end; a large two-story home with premium materials and architectural detail falls higher.
The transformation happens fast once the crew is on-site—most residential siding replacements wrap up in a matter of days. What takes longer is the invisible work: proper tear-off, thorough inspection, and meticulous prep that ensures your new thermal envelope performs for decades.